Clothing Product Photography: How to Take Pictures of Clothes That Sell Online
Good clothing product photography comes down to shooting every product the same way: soft, even light, a plain background, the garment steamed and styled, and a fixed shot list of front, back, detail and on-body views. Consistency across the catalog matters more than any single beautiful photo.
Start With the Garment, Not the Camera
Most bad clothing photos are a preparation problem. Creases, lint, loose threads and a hanger mark read far more clearly in a zoomable product image than they do in person, and they are slow to fix in retouching.
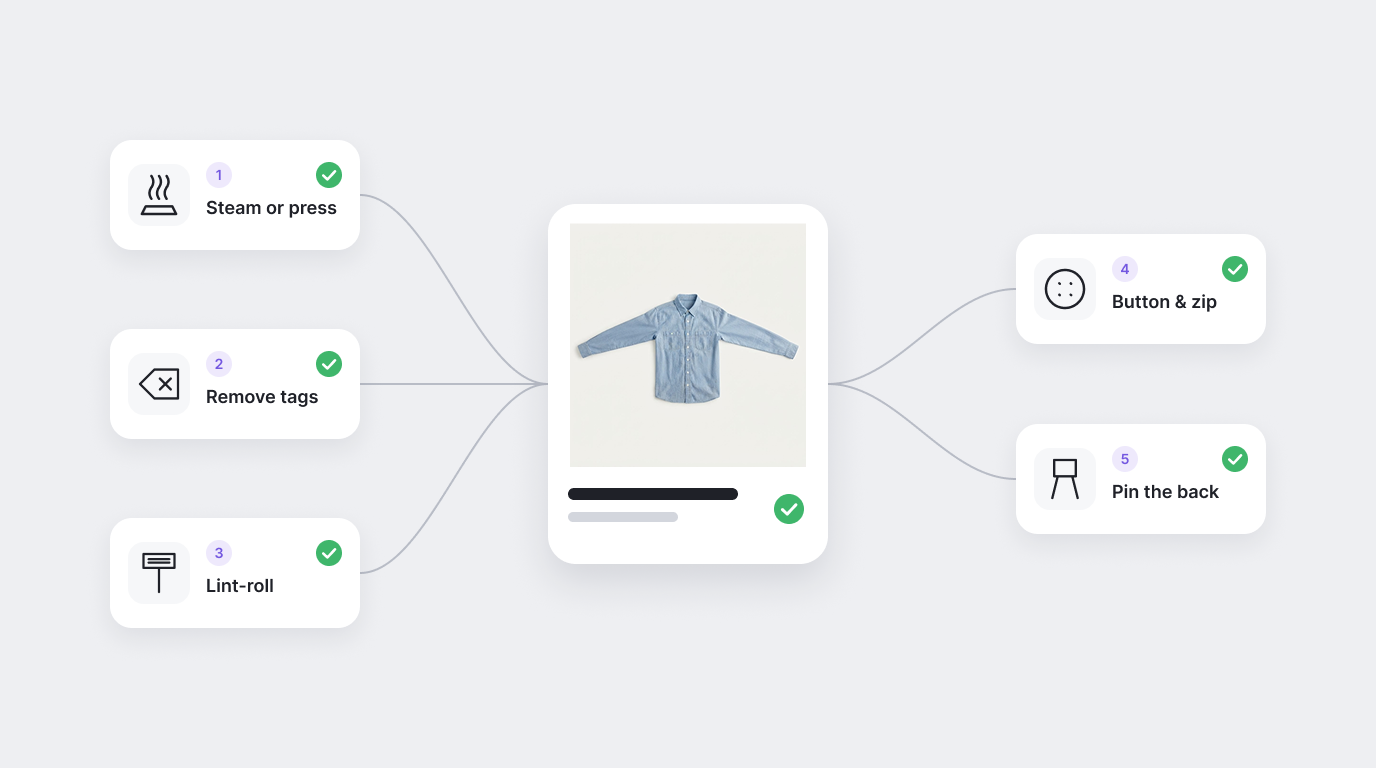
Before each product goes in front of the camera, run the same short routine:
- Steam or press the garment, including sleeves and hems.
- Remove tags, stickers and plastic, and trim loose threads.
- Lint-roll dark fabrics, which show every fiber under light.
- Button, zip and tie the piece the way a customer would wear it.
- Pin or clip excess fabric at the back so the front silhouette sits cleanly.
Light It Softly and Evenly
Clothing needs light that shows true color and fabric texture without hard shadows. Large diffused daylight from a window works for small volumes, as long as you shoot at the same time of day so color stays consistent from batch to batch.
For a catalog you will keep adding to, use two continuous LED softboxes at 45 degrees either side of the product, at the same height and power. Fix the camera's white balance to the lights rather than leaving it on auto, so a white shirt photographed this week matches one photographed next month.
Color accuracy is a returns issue, not just an aesthetic one. If the color on the page differs from the color in the box, customers send it back. Shoot a grey card at the start of each session and correct every image in the batch to it.
Choose Flat Lay, Mannequin or On-Model
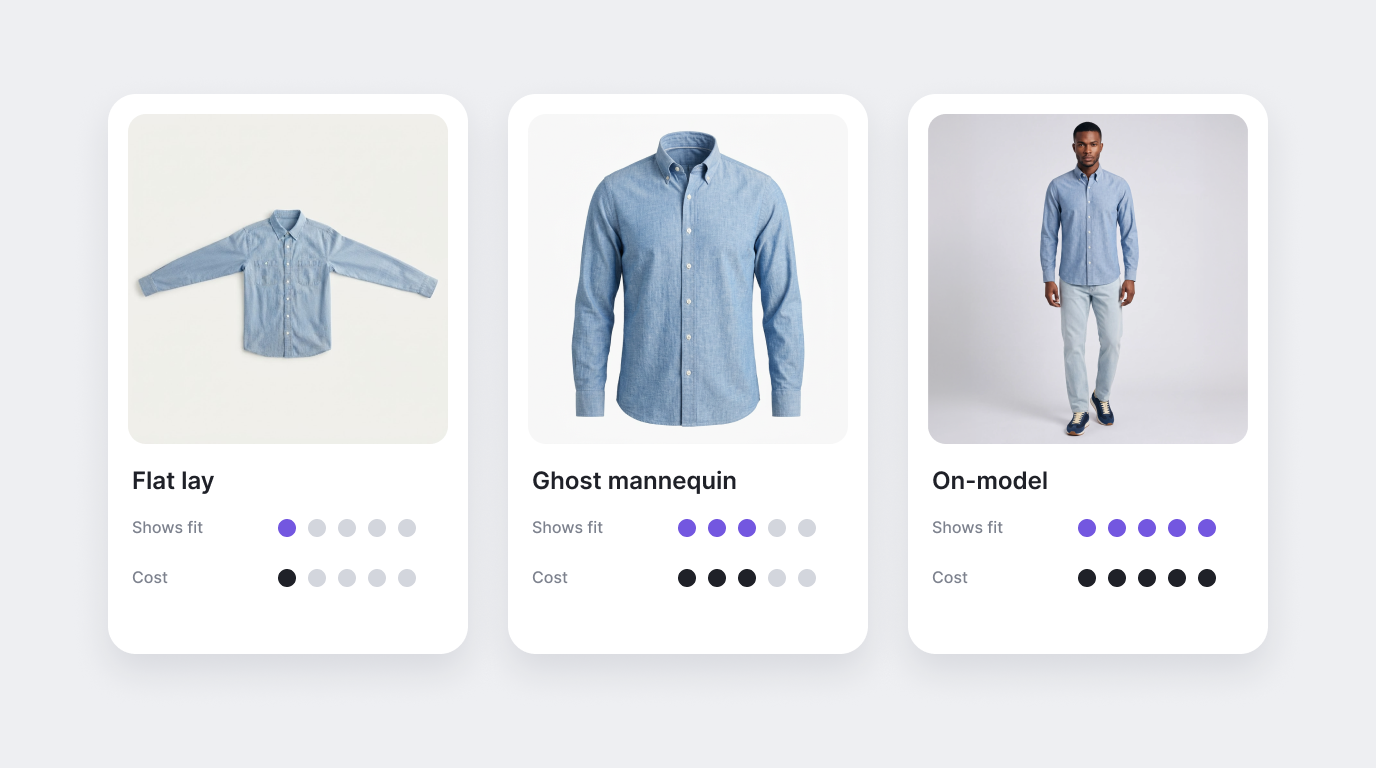
There are three standard ways to present a garment, and most stores use more than one.
| Style | Best for | Trade-off |
|---|---|---|
| Flat lay | Basics, kidswear, accessories, quick launches | Cheap and fast, but shows little about fit or drape |
| Ghost mannequin | Tops, jackets, dresses where shape matters | Shows structure without a person; needs a mannequin and some editing |
| On-model | Hero images, fit-sensitive items, ads | Shows fit and scale best, but models, studio time and retouching cost the most |
A flat lay is the easiest place to start. A ghost mannequin image shows the garment's three-dimensional shape with the mannequin edited out. An on-model image is what shoppers trust most for fit.
Use a Fixed Shot List for Every Product
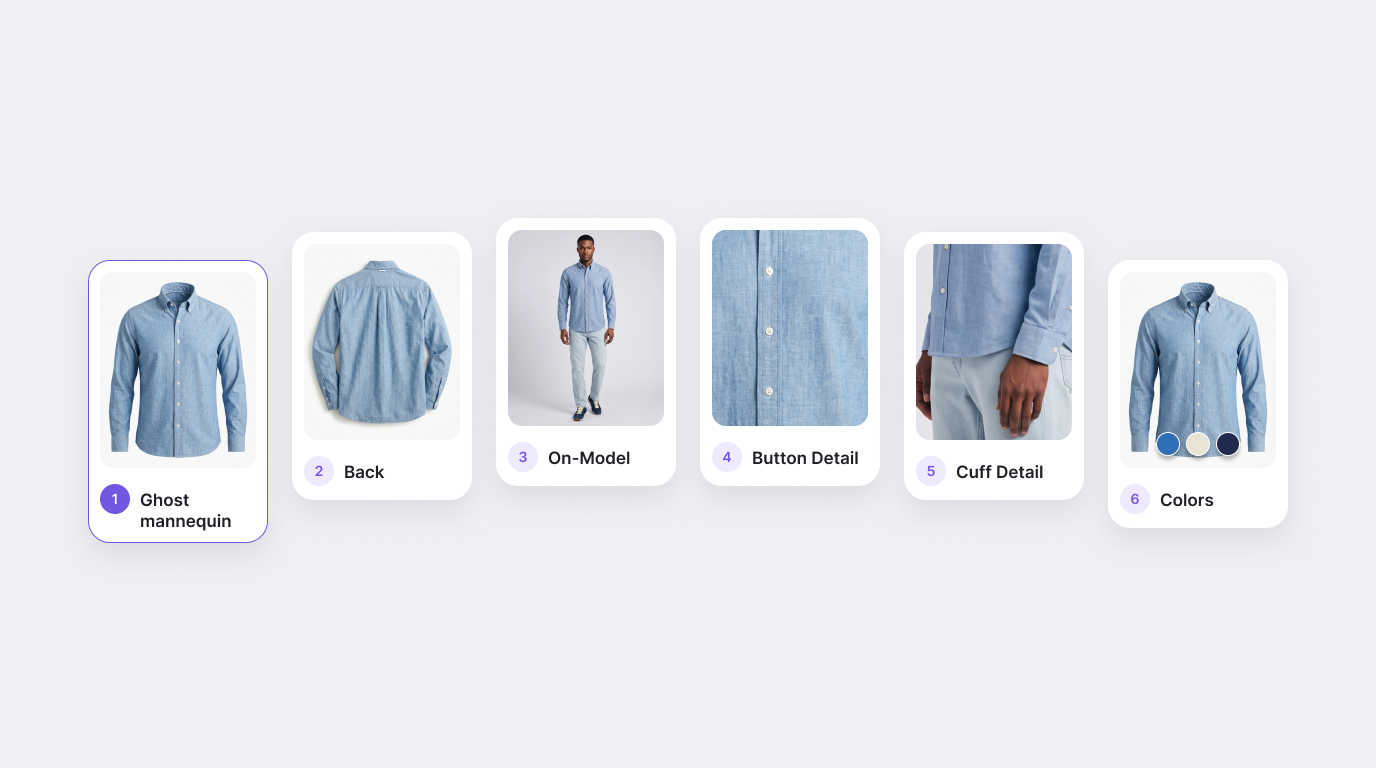
Shoppers compare products side by side, so every product page in a category should carry the same set of images in the same order. Decide the list once and shoot to it every time.
Front. The full garment, centered, filling most of the frame. This is usually the main image.
Back. Same framing as the front, so the two can be compared.
Side or three-quarter. Shows silhouette and how the garment falls.
Detail shots. Fabric texture, print, buttons, stitching and the care or brand label.
On-body or scale shot. How it fits a real body, with the model's height and size stated in the description.
Color variants. One front image per colorway, shot with identical framing and light.
Keep Framing and Backgrounds Consistent
Use a plain white or light grey background for catalog images. Mark the floor position of the product and the tripod with tape so framing does not drift during a session, and keep the same focal length and camera height for every product in a category.
Shoot at the highest resolution the camera allows and crop later. Zoom is one of the most used features on a product page, and a crop cannot add detail that was never captured.
Meet Each Marketplace's Image Rules
Every channel has its own requirements, and a non-compliant main image is one of the most common reasons a listing is suppressed. Amazon, for example, expects a main image on a pure white background with the product filling most of the frame, and enough resolution for zoom. The Amazon US image requirements guide covers the details.
Export a master image at full resolution, then generate each channel's size and crop from it, instead of re-shooting or re-editing per channel. Write descriptive alt text for every image, both for accessibility and so search engines understand what the image shows.
Studio, DIY or AI: How to Produce Your Clothing Photos
There are three ways to produce clothing product photography, and the right one depends on how many products you launch and how often.
| Approach | Works well for | Trade-off |
|---|---|---|
| DIY at home or in the office | Small catalogs and steady, low volumes | Cheapest per image, but your time goes into every shoot and edit |
| Photo studio | Hero images, campaigns and fit-critical products | Highest quality control, but you pay for models, studio time and retouching on every new style |
| AI from your own product photos | New colorways, on-model views and channel variants at volume | Needs a clean source photo, and every output should be checked before it goes live |
Many stores combine them: a studio or DIY shoot for the source images, then AI to produce the on-model views and every channel's crop.
When to Use AI Instead of a Reshoot
Once the basics are in place, the expensive part is volume: every new style, every colorway and every channel multiplies the number of images you need. This is where AI imagery earns its place.
Photogenix starts from product photos you already have. It can turn flat lays and mannequin shots into on-model images while preserving fabric texture, drape and lighting, create AI model photography across poses, scenes and styling without a studio shoot, and export each image to the dimensions a channel needs.
Selling on Shopify? The Photogenix app for Shopify works inside your store admin. You can also try Photogenix free on a few of your own product photos.
The rule from the start of this guide still applies: AI output is only as good as the source image. A clean, well-lit, correctly colored product photo is the input that makes everything after it work. For what to put on the page around those images, see how to create PDP images that convert.