
How to list your products on Ajio
As a fashion retailer, you need to be where your shoppers are. This makes it imperative to list your products on multiple marketplaces and online channels.
However, listing on marketplaces poses some challenges. Some of the common ones are:
- Multiple templates to download, fill and keep track of
- Different taxonomies to follow for different marketplaces
- Each marketplace has specific template guidelines that you need to follow
- Images need to be optimised as per each marketplace's guidelines
And the list goes on. Retailers struggle with cataloguing teams to ensure consistency of data and faster turnaround times.
In this series of posts, we will guide you through the steps of setting up your account as well as product listings. Although some products will be unique and may require additional fields, this step-by-step process will cover the basics.
HOW TO GET STARTED ON AJIO
Step #1: Create a Ajio Seller account
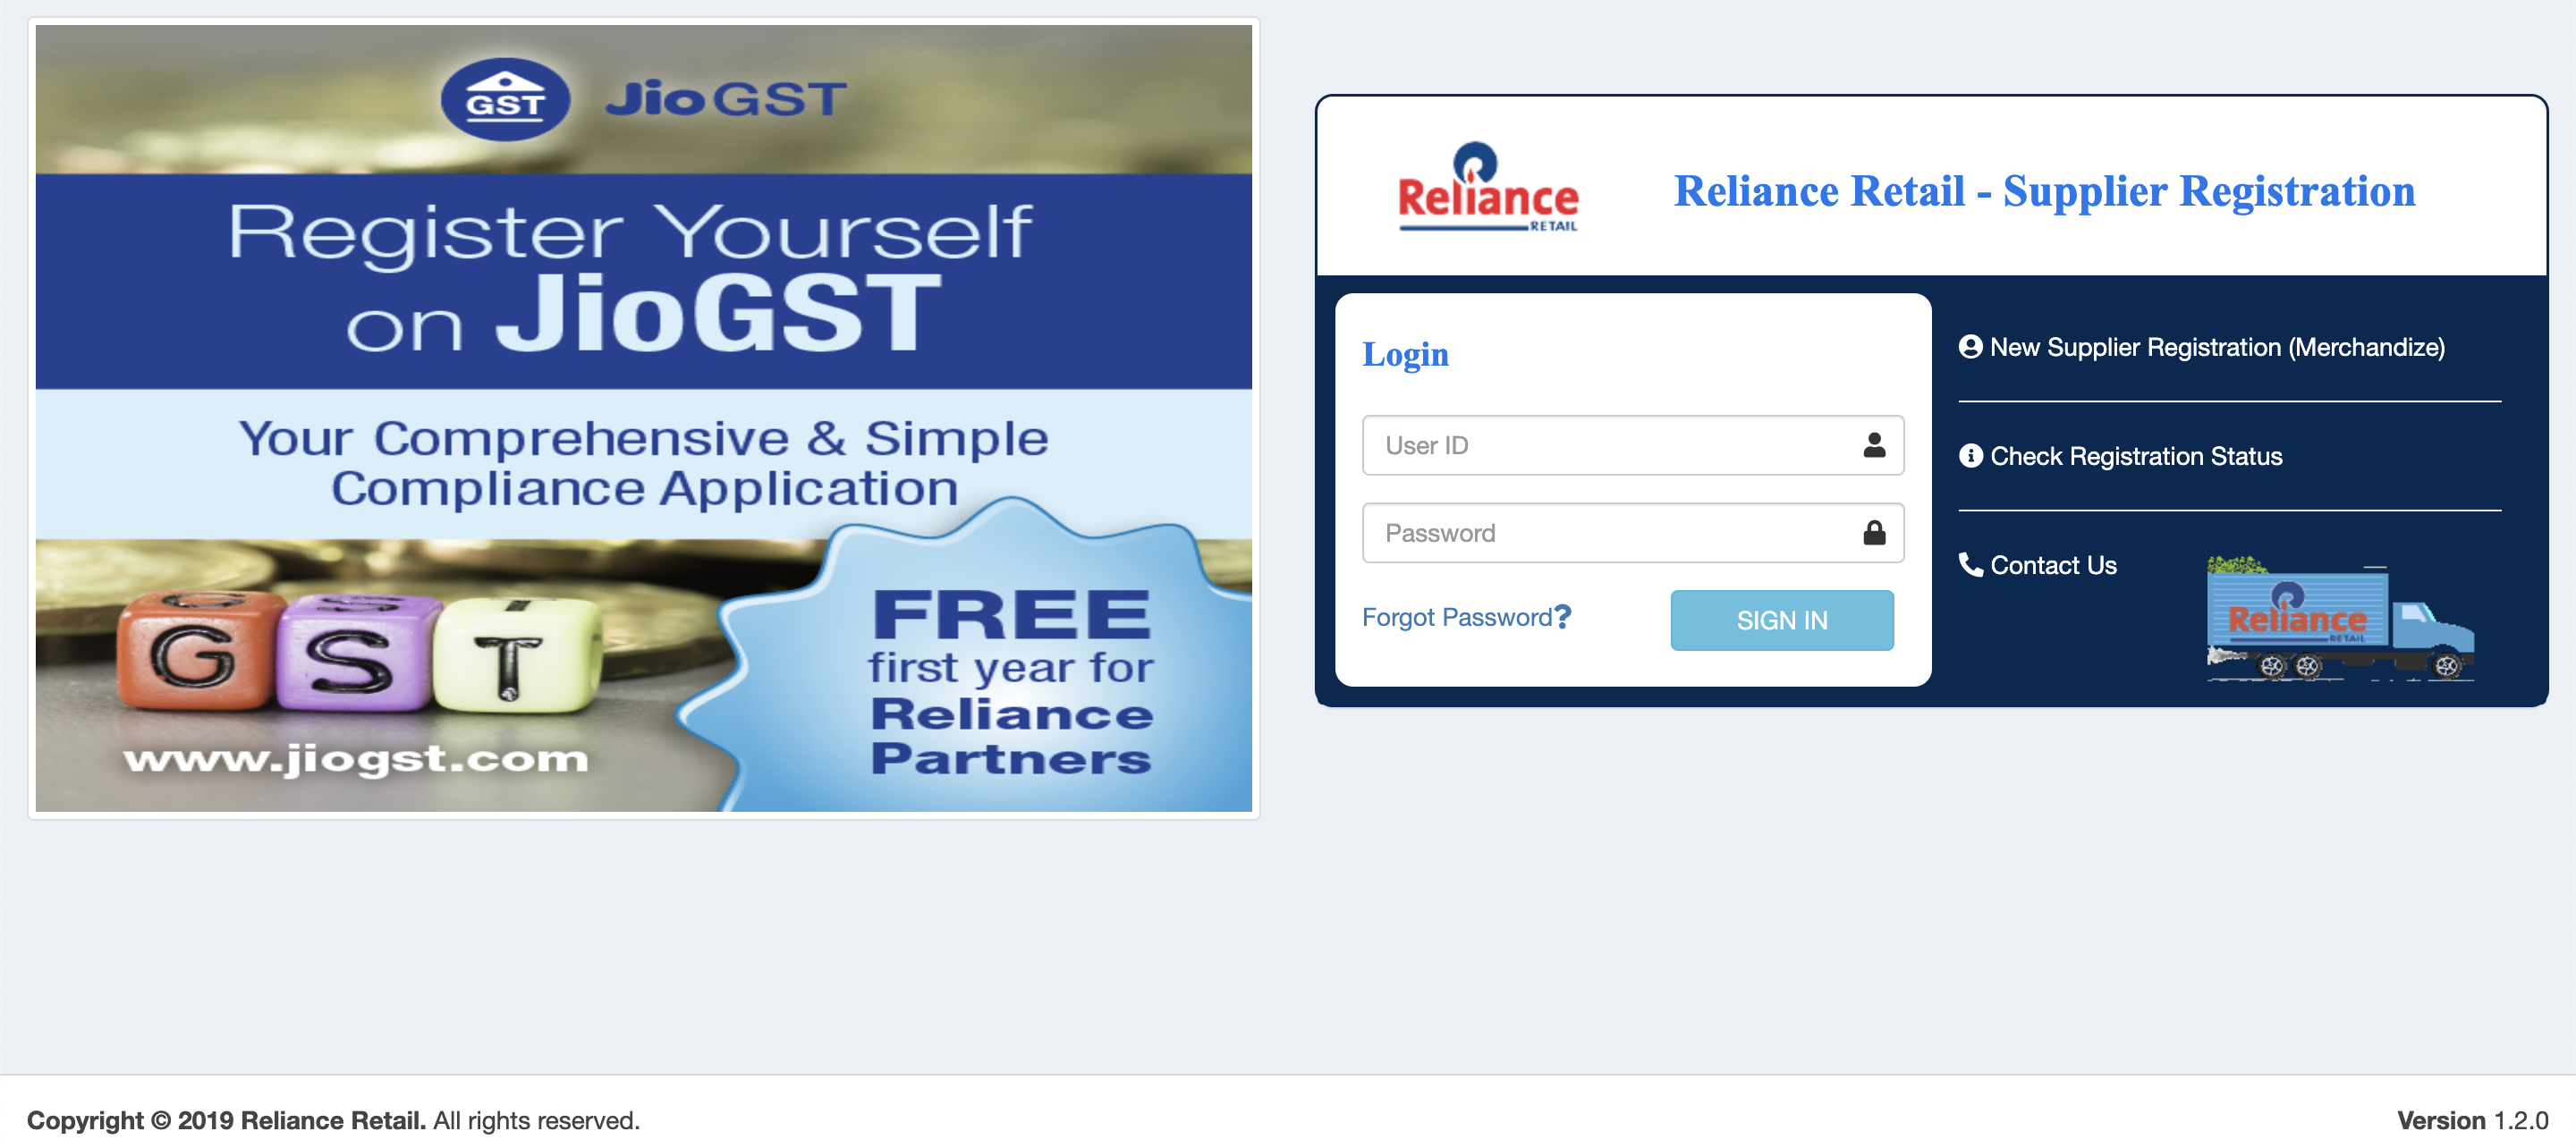
If your company does not already have an Ajio Seller account, the first step is to create one. The account will have to be created on the Reliance retail-supplier registration website. Register here or sign in with your seller account.
To register a new account, click on ‘New Supplier Registration (Merchandize)’. You will be asked to submit your PAN and other data requested by the website connected to your PAN while creating an account. After entering the correct PAN information, the vendor’s name will be automatically displayed on the screen. That is how Reliance verifies your business. Further, you will be requested to fill in and submit a list of documents related to your business.
You are required to submit the following documents/details:
- PAN Card
- Aadhar Card
- GST Details
- Current Account Details + Cancelled Cheque
- MSME Certificate (Optional)
- Logo if any
- Trademark Certificate (Alternative stated below)
- CIN & TAN certificate in case your company is a private entity
The last step is to provide your contact details, including your phone number and email address. With this, you have submitted every possible information for registration. Your registered mobile number will receive an OTP from the website as verification.
Once registered, you can start listing by logging in to the Ajio seller site.
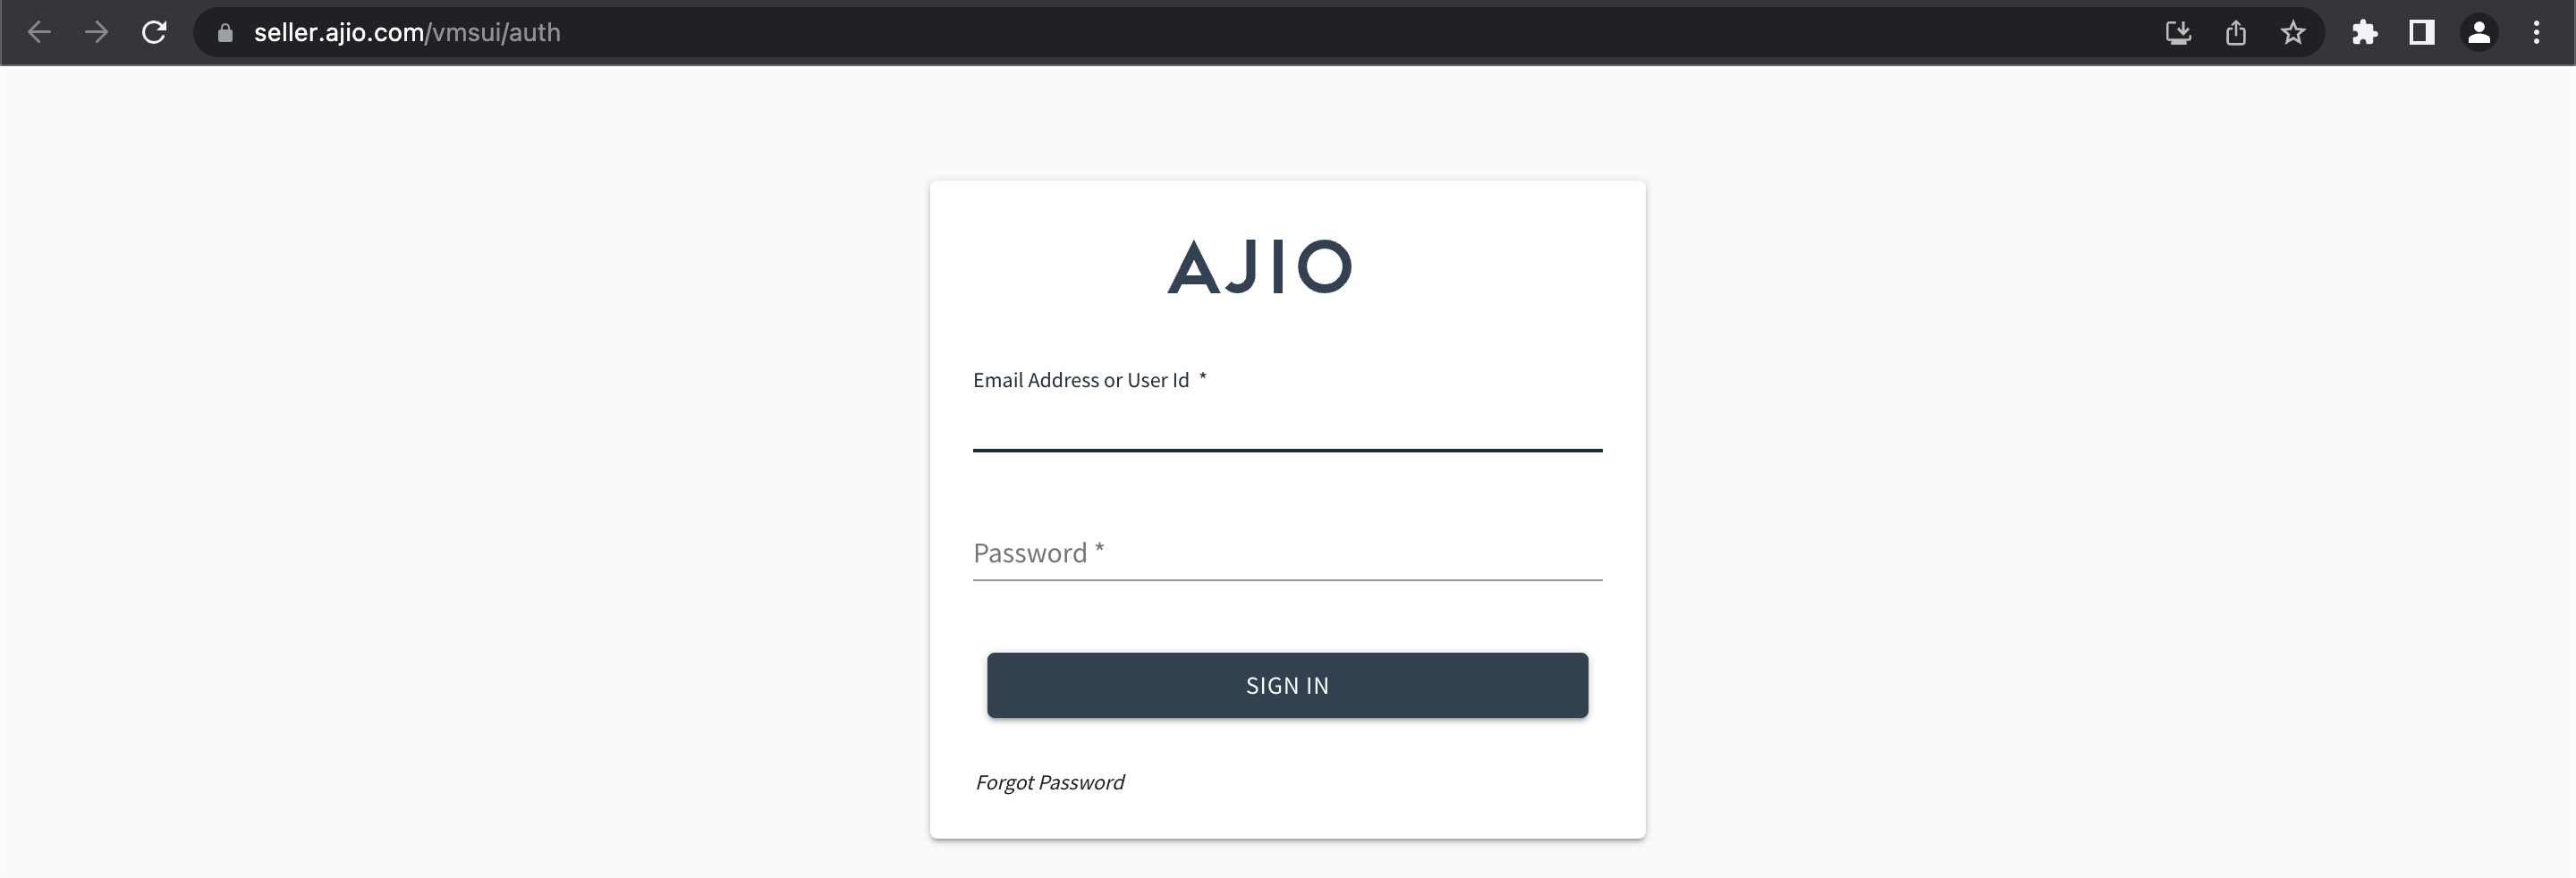
Step #2: Download the correct product listing template
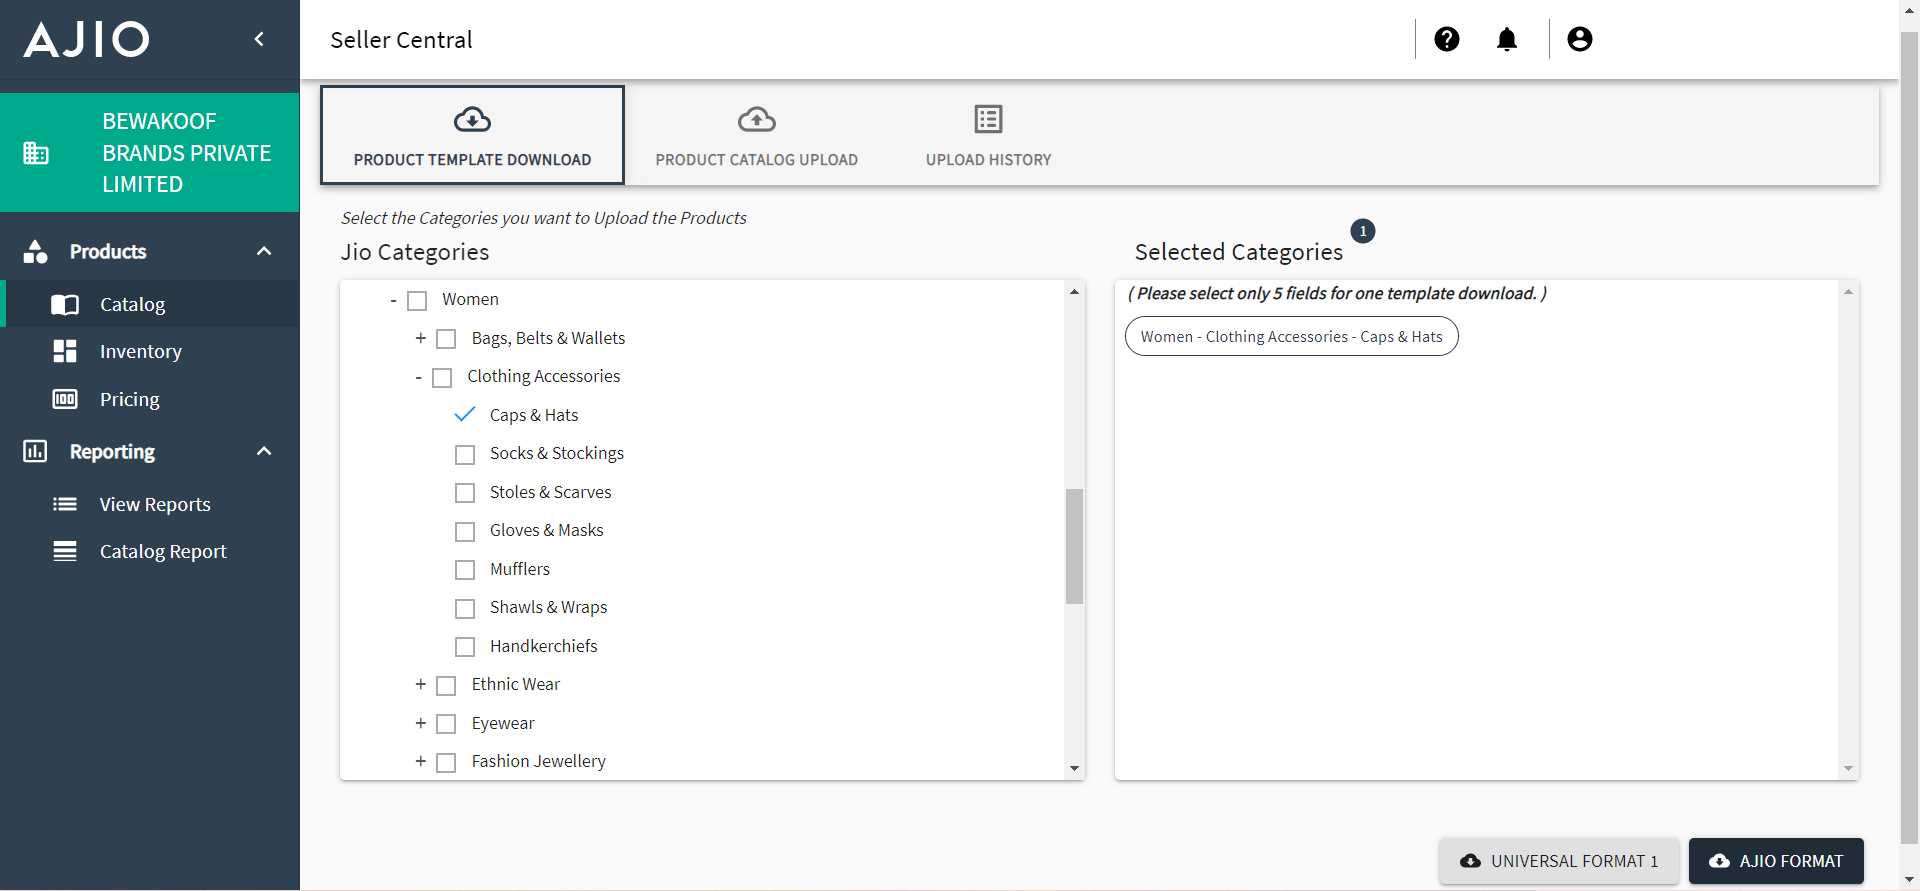
The next step is to ensure that you download the right product listing templates for your product category by selecting ‘Product template download’. Each of Ajio’s product categories has unique templates categorized by gender. There are no restrictions on renaming the downloaded templates, and a maximum of 5 templates can be downloaded at once. These templates come in an excel format and include a list of mandatory attributes as well as optional attributes that need to be filled in for each product SKU. It is best to avoid the common mistake of choosing the wrong template, as this will ensure your feed’s rejection along with wasted time.
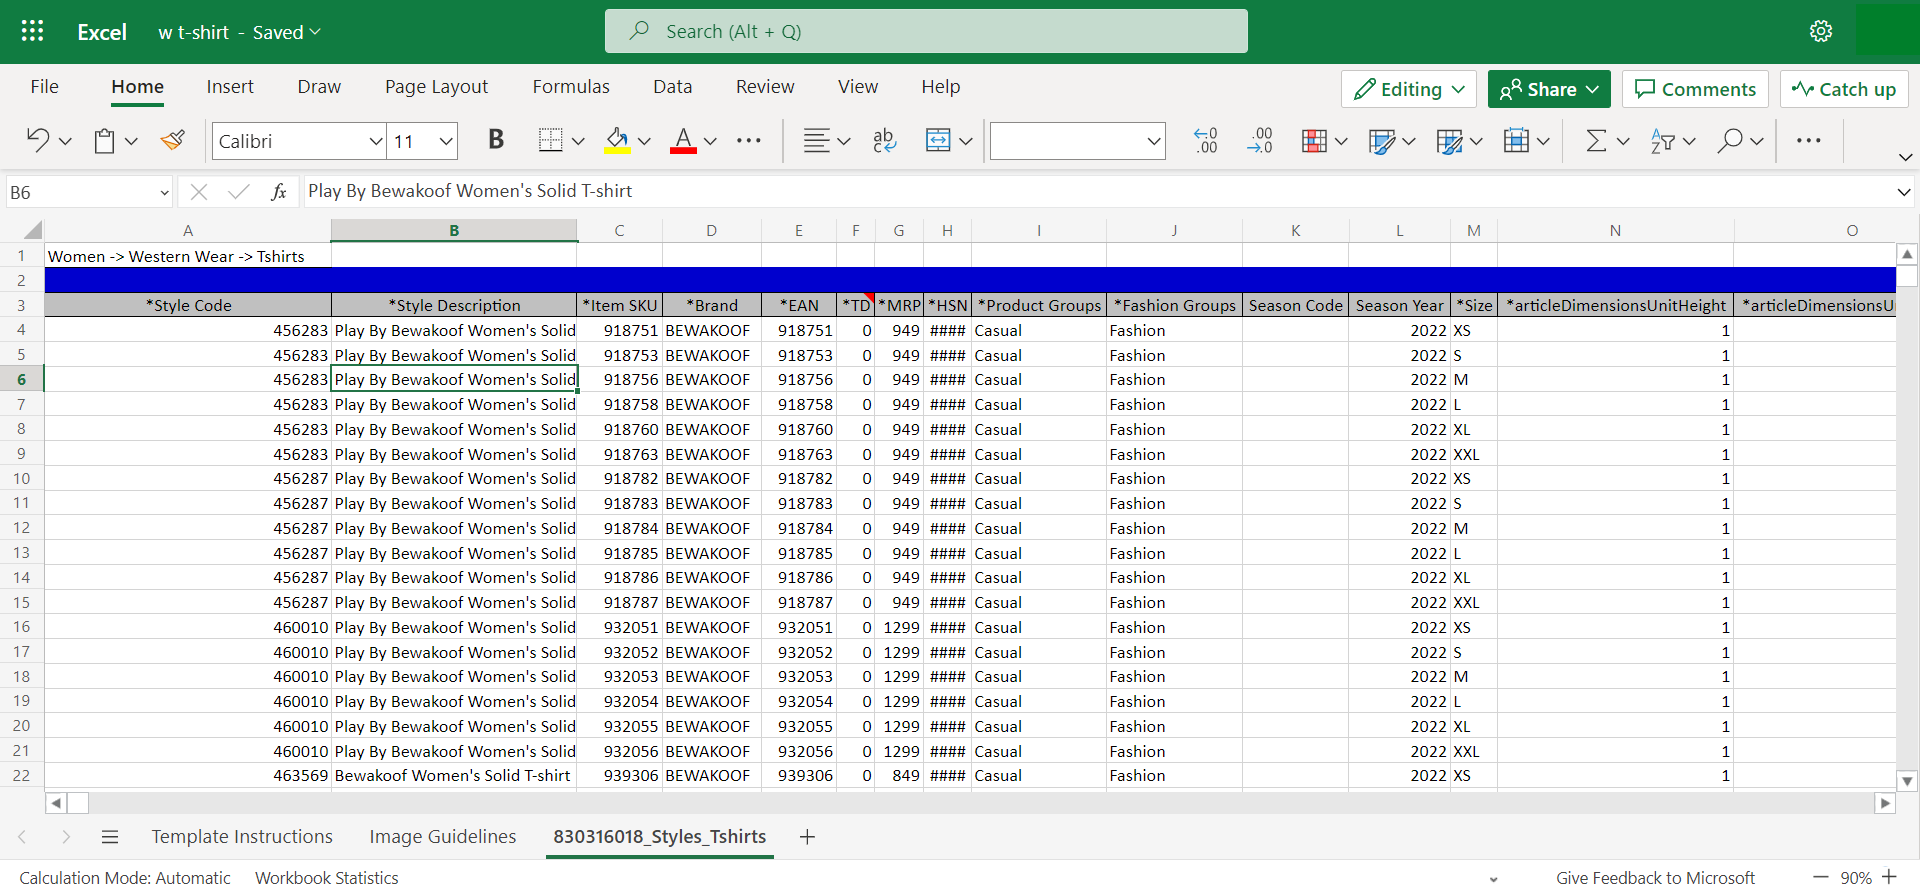
Step #3: Fill in the product listing template accurately
You are required to fill in specific details mandatorily (specified by a ‘*’ in the template) for products such as product category, seller SKU, brand name and product ID among others. Other optional fields can be chosen to be filled or not depending on the seller.
Step #4: Listing the products
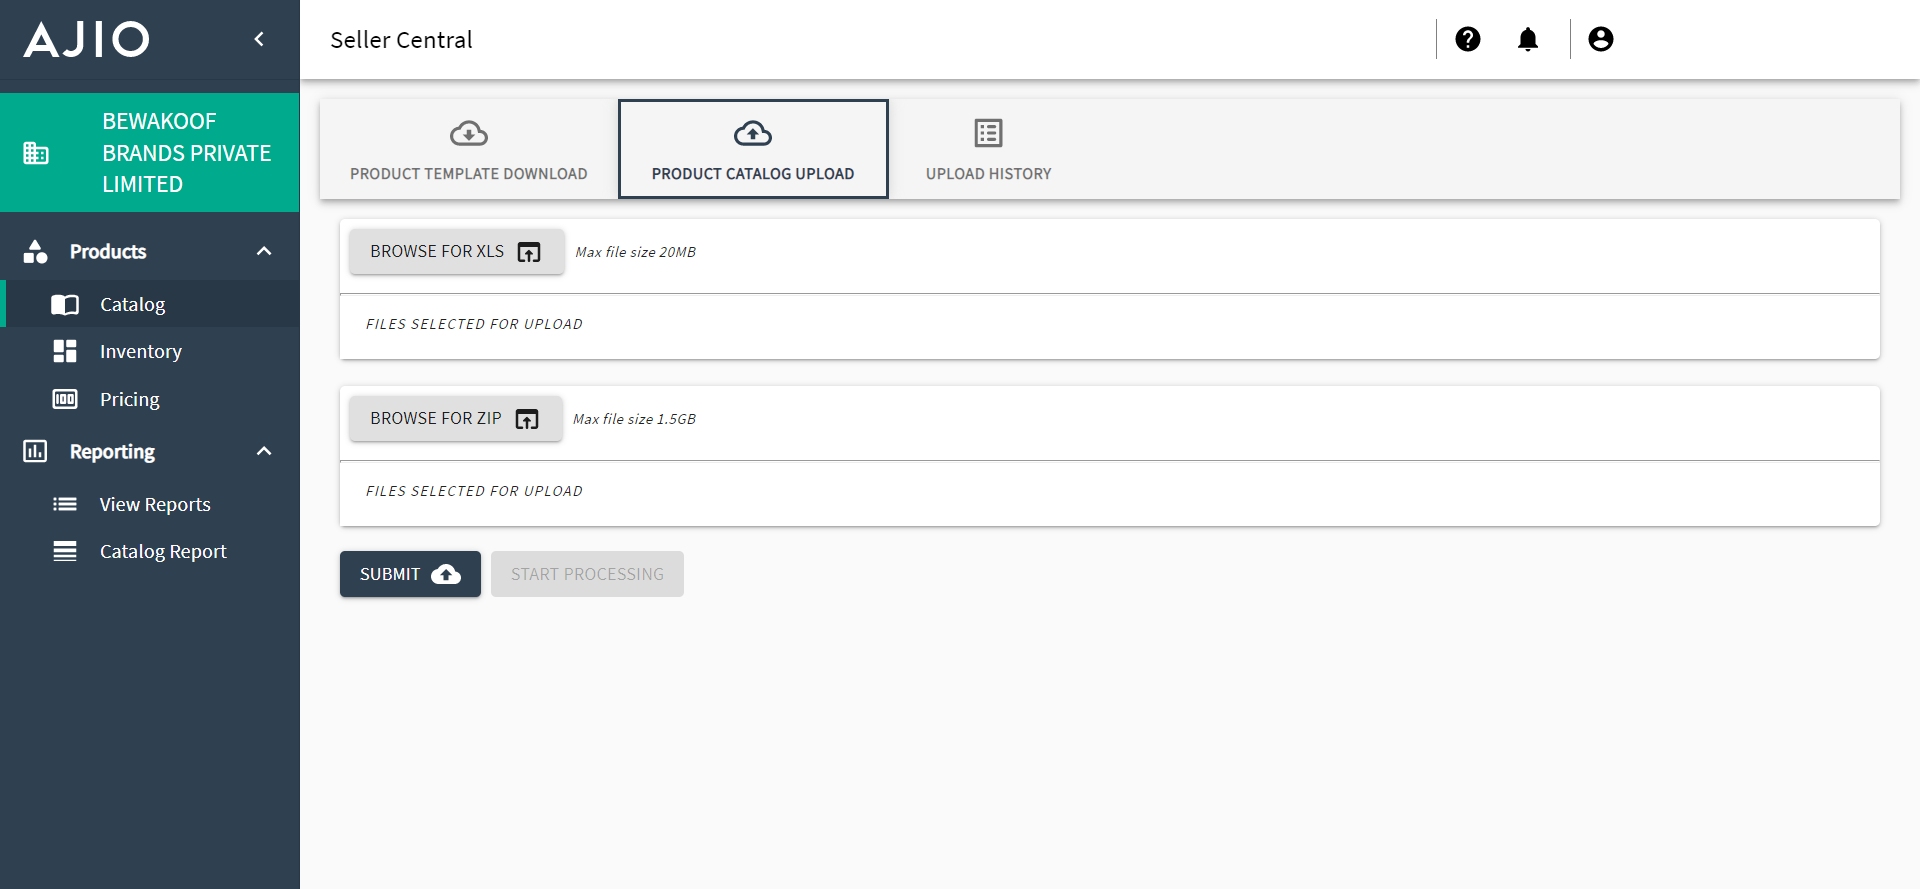
This step requires you to upload the product listing template onto the Ajio Seller account platform. This is done by selecting ‘Product catalog upload’. Browse for your file, attach them and click on submit in order to add the products. Finally, click on ‘Start processing’ and in case the file does not have any errors, you will have a successful product listing process. You are provided with a unique Feed ID and tracking information regarding the success or failure of listing for each upload. Select ‘Upload History’ in order to download the error/rejected files.

Step #5: Errors/Failure in the product listing
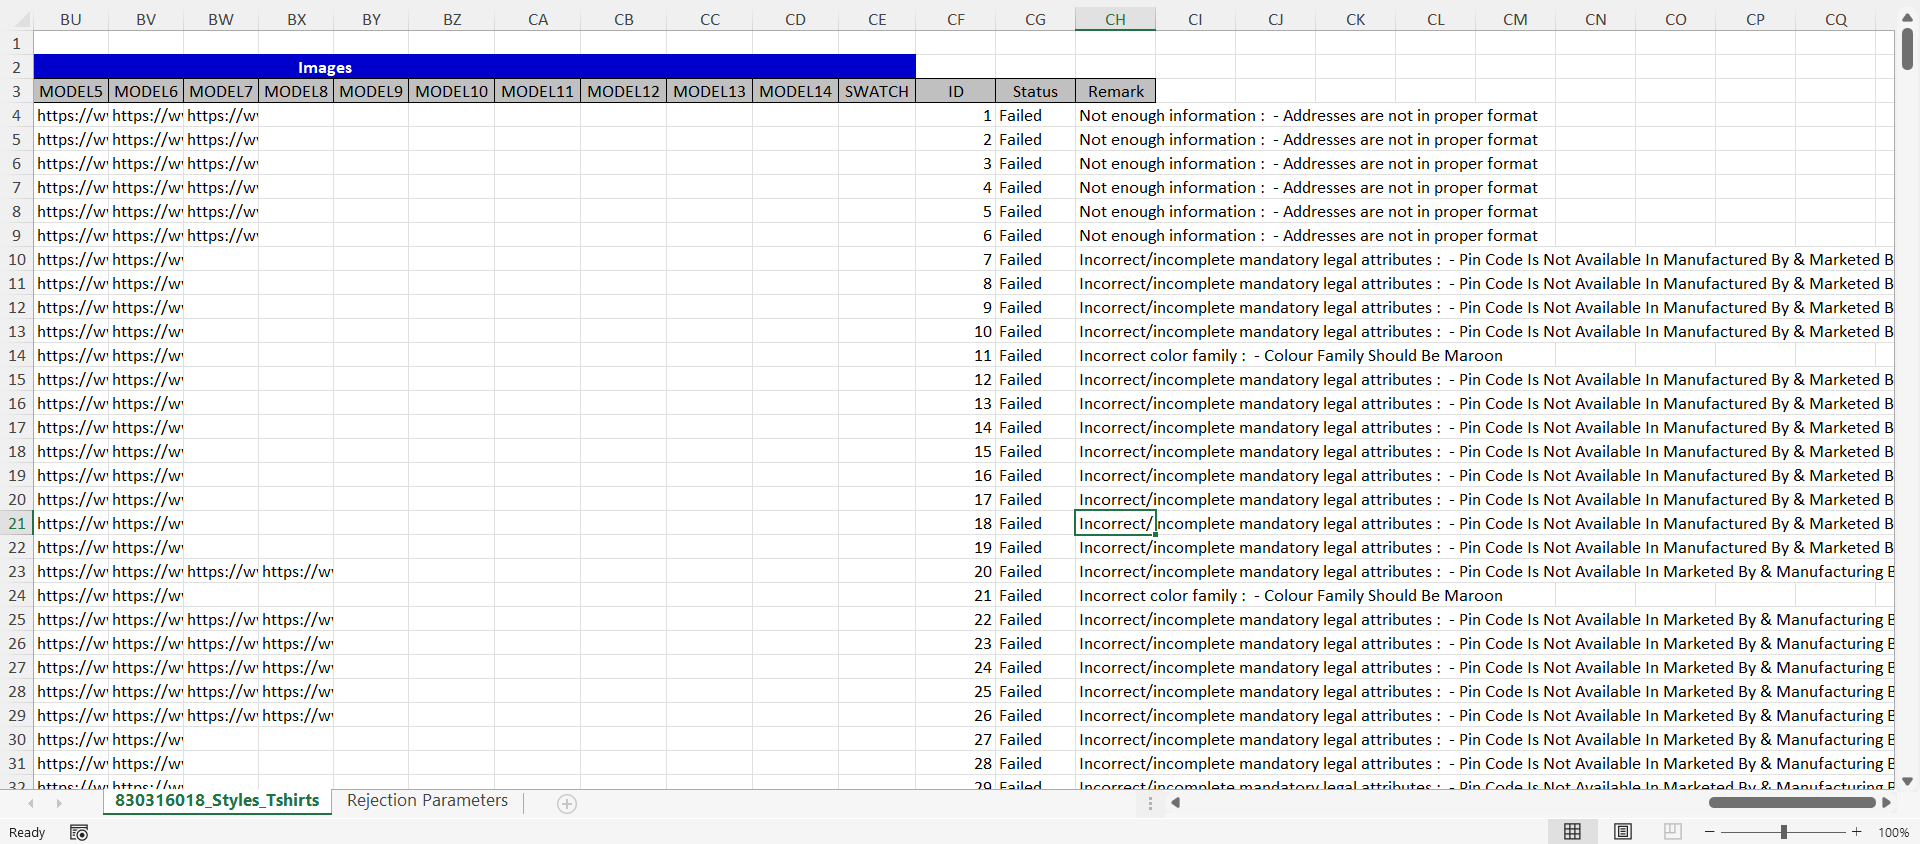
This step is optional and is needed only if your product listing template has failed to list. The type of errors along with the products is presented on the platform:
- Auto QC - for errors related to image, entry of values not done according to the drop-down options in the template, etc.
- Manual QC – for other errors related to free text attributes and other discrepancies in the information entered
- View Rejected HSN – A list of products with rejected HSN numbers are displayed
To complete a successful product listing, they must be corrected in the upload file, re-uploaded and submitted again for review.
CATALOGIX
Catalogix is an AI-powered cataloging and feed management solution that gets you from products to multiple marketplace and channel listings in a couple of hours. Once your seller account is created, complex excel sheets have to be filled and uploaded to list on marketplaces. Catalogix automatically fills all the mandatory attributes, including product titles and descriptions along with creating relevant image links/folders as per that marketplace's requirement. We even provide end-to-end support and handle upload and rejection management as well.

Talk to us today to learn more!
Read Next: How to list your products on Limeroad

Generative AI paves a whole new way for content generation in Fashion

